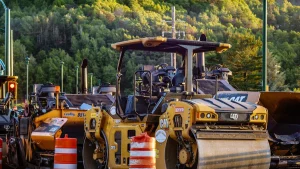
- Use the power trowel only after bleed water has evaporated; finishing too early can trap moisture and weaken the surface.
- Make multiple passes: float pan or float blades first, then finish blades for tighter surface closure and smoother concrete floors.
- Industrial slabs need more than appearance control; flatness, abrasion resistance, and joint planning all affect long-term performance.
- Match machine size, blade type, and engine power to slab thickness, access width, and desired finish level.
How to use a power trowel for smooth industrial concrete floors is a timing-and-technique problem, not just an equipment question, and the best finishing results usually depend on disciplined surface preparation, correct pass timing, and verification against accepted flatness and finishing standards such as ASTM E1155 for floor profiling and ACI 302.1R for slab finishing guidance; in practice, many industrial floors target tighter tolerances than ordinary slab work because forklifts, pallet jacks, and storage racking amplify every high spot and ridge.
Power trowel basics for smooth concrete floors
The power trowel is the finishing machine that transforms a plastic concrete surface into a denser industrial floor.
Its rotating blades or pans apply controlled pressure, which compacts the top paste, closes pores, and levels minor ridges left by screeding and bull floating.
For large slabs, a walk-behind unit is common in edges and medium areas, while ride-on machines are used when productivity and operator endurance matter more than maneuverability.
In the CONSMAC product ecosystem, the finishing stage is part of a larger concrete workflow that also includes material mixing, slab preparation, and post-placement cutting, so a contractor can combine a concrete mixer, a power trowel, and a floor grinding machine when a project needs both fresh-placement finishing and later surface correction.
Industrial floors are demanding because the finish has to support both human comfort and machine loads, and that means the trowel pass pattern must be planned before the concrete sets rather than improvised at the end.
| Industrial floor task | Typical equipment | Why it matters | Common measurable target |
|---|---|---|---|
| Placement and batching | Concrete mixer | Consistent mix quality supports uniform finishing | Uniform slump within project specification |
| Base compaction | Plate compactor | Reduces settlement and slab cracking risk | Compaction to project density target |
| Edge and detail finishing | Walk-behind power trowel | Controls perimeter smoothness and tie-ins | Flat edge transitions |
| Large-area surface closure | Ride-on power trowel | Improves throughput on big slabs | Higher square footage per hour |
When to start power trowel concrete finishing
The right finishing window begins after bleed water disappears and the slab can support the machine without tearing the paste.
ACI 302.1R emphasizes that finishing too early can seal in bleed water and create scaling, blistering, and weak surface paste, which is why experienced finishers watch the slab, not the clock.
Concrete curing conditions, ambient temperature, wind, and mix design all change the timing, so a 90-minute finishing window on one job can shrink to 30 minutes on a hot, dry day.
A practical field rule is to test the surface with a boot print: if it leaves a shallow mark without bringing water to the top, the slab is usually approaching the first float pass window.
For industrial floors, the opening passes should be conservative, because aggressive blade angles at the wrong stage can close the surface unevenly and leave trowel marks that become visible under raking light or warehouse LEDs.
| Surface condition | Field observation | Recommended action | Risk if ignored |
|---|---|---|---|
| Bleed water visible | Glossy water sheen on top | Wait | Trapped water, weak surface |
| Initial set approaching | Footprint remains but no water rises | Start float pass | Surface tearing if delayed too long |
| Plastic to stiff transition | Surface resists light pressure | Move to finishing pass | Machine chatter if too dry |
| Nearly hardened | Blade leaves shallow burnish only | Final pass only if needed | Burn marks and poor closure |
For concrete finishing work, the main decision is not how many passes to make, but whether the slab has reached the right moisture state for each pass.
How to use a power trowel step by step
The safest way to use a power trowel is to build the finish in layers rather than trying to achieve final smoothness in one aggressive pass.
- Inspect the slab surface and confirm bleed water has left the surface.
- Start with low speed and shallow blade angle, especially on the first float pass.
- Overlap each path by about one-third of the machine width to prevent visible bands.
- Increase blade pitch gradually as the concrete firms up.
- Finish with faster blade speed and tighter overlap for a denser, smoother surface.
- Check edges, corners, and column lines separately with a walk-behind unit or hand finishing tools.
The first pass is about leveling, not polishing, and the second and third passes are where the floor gains tightness and reflectivity.
On a large slab, ride-on machines improve productivity, while compact walk-behind models are better for doorways, loading bays, and perimeter work where a larger machine cannot turn cleanly.
To keep the workflow efficient, many contractors stage the job around complementary equipment such as a rammer for trench or edge compaction and a road marking machine for nearby site circulation or parking-lot layouts after curing is complete.
A smooth industrial concrete floor depends on consistent pass overlap and blade control more than operator force, because the machine should glide and compress rather than scrape and gouge.
Blade types, engine power, and machine selection
The correct power trowel setup depends on slab size, access width, and the finish expectation for the facility.
Float pans are used to spread and compact the surface early, while finishing blades are better for denser closure and a smoother appearance later in the set.
Gasoline and diesel power choices matter when the jobsite has limited electrical access, and engine output affects how steadily the blades hold speed under load.
Industrial users typically compare not only blade diameter but also fuel type, safety controls, and transport weight because these directly influence productivity on a live construction site.
| Selection factor | Walk-behind trowel | Ride-on trowel | Practical impact |
|---|---|---|---|
| Working area | Edges, rooms, small slabs | Large open floors | Controls access and output |
| Operator fatigue | Higher | Lower | Ride-on improves long shifts |
| Maneuverability | Very high | Moderate | Walk-behind fits tight corners |
| Production rate | Moderate | High | Ride-on suits warehouses and plants |
For buyers comparing concrete finishing equipment, the best choice is the model that matches the slab geometry and daily square footage, not simply the largest engine on the list.
When a contractor also needs slab preparation and later remediation, the finishing fleet may be paired with a floor grinding machine for surface correction and a concrete cutting machine for joint repair or control cuts.
Surface quality targets for smooth concrete floors
A smooth industrial floor should be judged by flatness, consistency, and service behavior rather than shine alone.
ASTM E1155 defines floor flatness and levelness measurement using F-number methodology, which is widely referenced when slab tolerances matter for racks, lifts, or automated movement.
In many industrial settings, a smoother looking surface still fails operational needs if it has localized humps, curled edges, or random blade waves that disrupt carts and forklifts.

That is why finishing decisions should be tied to the end use of the slab, including traffic type, cleaning method, and expected chemical exposure.
| Quality indicator | What it means | How it is checked | Why it matters |
|---|---|---|---|
| Flatness | Consistency across the slab | ASTM E1155 F-number testing | Forklift stability |
| Surface closure | Reduced open pores and paste voids | Visual and tactile inspection | Dust resistance |
| Edge quality | Clean transitions at joints and perimeters | Close visual inspection | Reduced chipping |
| Wear resistance | Ability to withstand traffic and abrasion | Service performance over time | Lower maintenance cost |
In a warehouse, the difference between acceptable and excellent finishing often appears only after traffic starts, because a slab that looks smooth on day one may still telegraph blade marks under real operations.
For that reason, concrete finishing should be planned with future use in mind, especially where pallet jacks, guided vehicles, or frequent washdown are expected.
Common mistakes in power trowel concrete finishing
Most finishing defects come from timing errors, blade setup errors, or trying to rescue a slab that has already moved too far into set.
- Starting too early and sealing bleed water into the surface.
- Using too much blade pitch before the slab can support it.
- Running inconsistent overlap and leaving visible lap lines.
- Ignoring edges, corners, and around column bases until the slab is too stiff.
- Overworking the surface, which can create burns, delamination, or dusting.
Surface defects are expensive because they may require grinding, resurfacing, or even localized demolition if the floor is part of a critical industrial operation.
A well-managed job reduces rework by combining slab preparation, clean placement, and controlled power trowel passes rather than relying on correction at the end.
That is why contractors often keep cutting and repair tools ready, including a concrete cutting machine for control joints and a rammer for base repair in adjacent work zones.
Concrete finishing standards, testing, and verification
Verification matters because a smooth floor should be measurable, not just visually convincing.
ASTM E1155 is commonly used to quantify floor flatness and levelness, while ACI 302.1R provides practical guidance on slab placement and finishing practices that affect the final result.
For project documentation, contractors may record mix design, ambient conditions, finishing start time, pass sequence, and final inspection notes to explain why one slab performed better than another.
That type of record is useful for industrial owners because it turns finishing quality into a repeatable process instead of a subjective claim.
| Documented factor | Typical record | Why it helps | Reference type |
|---|---|---|---|
| Mix design | Water-cement ratio, admixtures | Predicts workability window | Project submittal |
| Ambient conditions | Temperature, wind, humidity | Explains set timing | Site log |
| Finishing sequence | Float pass, finish pass, burnish pass | Supports quality review | Field checklist |
| Final test result | Flatness and levelness values | Confirms spec compliance | ASTM E1155 report |
When an owner asks how to use a power trowel for smooth industrial concrete floors, the full answer includes testing and documentation, because the best finish is the one that performs after handover.
Jobsite workflow for industrial concrete floors
A reliable finishing workflow starts before concrete arrives and ends only after the slab is protected during curing.
The sequence usually runs from subgrade preparation to compaction, placement, strikeoff, floating, finishing, joint cutting, and curing protection.
Skipping a step often shifts risk downstream, which is why a poor base can show up later as curling, cracking, or uneven finish lines even if the trowel work itself was skilled.
- Prepare and compact the base.
- Place and consolidate the concrete evenly.
- Screed and bull float to establish plane.
- Wait for bleed water to leave the surface.
- Make float and finish passes with the power trowel.
- Cut joints at the planned time and cure the slab properly.
For sites that also need road or yard work, the same contractor may shift after curing to use a road marking machine or other pavement equipment to complete the site package without changing vendors.
That integrated approach aligns with the reality of industrial projects: one machine rarely solves the whole floor system.
FAQ about power trowel concrete finishing
1. What is the main purpose of a power trowel?
The main purpose of a power trowel is to smooth, densify, and close the surface of fresh concrete so it finishes flatter and more durable.
2. When should I start using a power trowel?
You should start after bleed water has disappeared and the slab can support finishing without tearing or sealing in excess moisture.
3. Is a ride-on power trowel better than a walk-behind model?
A ride-on model is better for large open industrial floors, while a walk-behind unit is better for edges, smaller rooms, and tight access zones.
4. How do I get a very smooth concrete floor?
Use multiple passes, keep overlap consistent, increase blade pitch gradually, and finish at the correct stage of set rather than trying to force smoothness early.
5. What standards apply to industrial concrete floor flatness?
ASTM E1155 is widely used for flatness and levelness measurement, and ACI 302.1R is a key finishing reference for slab placement guidance.
6. Why do trowel marks appear on some floors?
Trowel marks usually come from incorrect timing, inconsistent blade angle, uneven overlap, or overworking a surface that has already stiffened too much.
7. Can a power trowel fix a bad slab?
A power trowel can improve the finish, but it cannot fully correct a badly placed, poorly compacted, or out-of-tolerance slab.