
- Most long-use failures come from maintenance drift, not sudden catastrophic damage.
- Airflow, fuel quality, ignition, and clutch wear are the first checks in tamping rammer troubleshooting.
- Compression loss and a damaged bellows or spring system can mimic engine failure.
- Preventive service intervals matter more than reactive repairs for high-cycle compaction equipment.
When a tamping rammer stops working after long use, the root cause is usually measurable: blocked intake flow, worn ignition parts, contaminated fuel, or mechanical wear in the drive train. A compacting machine that once delivered strong impact force can gradually lose performance long before it fully fails. For technicians, the most reliable way to troubleshoot is to work from the engine outward, then verify the impact system, because the machine may start normally while still failing to compact. ISO 18674-3 provides a standardized framework for in situ soil testing concepts, and field compaction quality is often checked against project requirements rather than guesswork. For related site equipment used in the same workflow, see rammers, plate compactors, and concrete cutting machines.
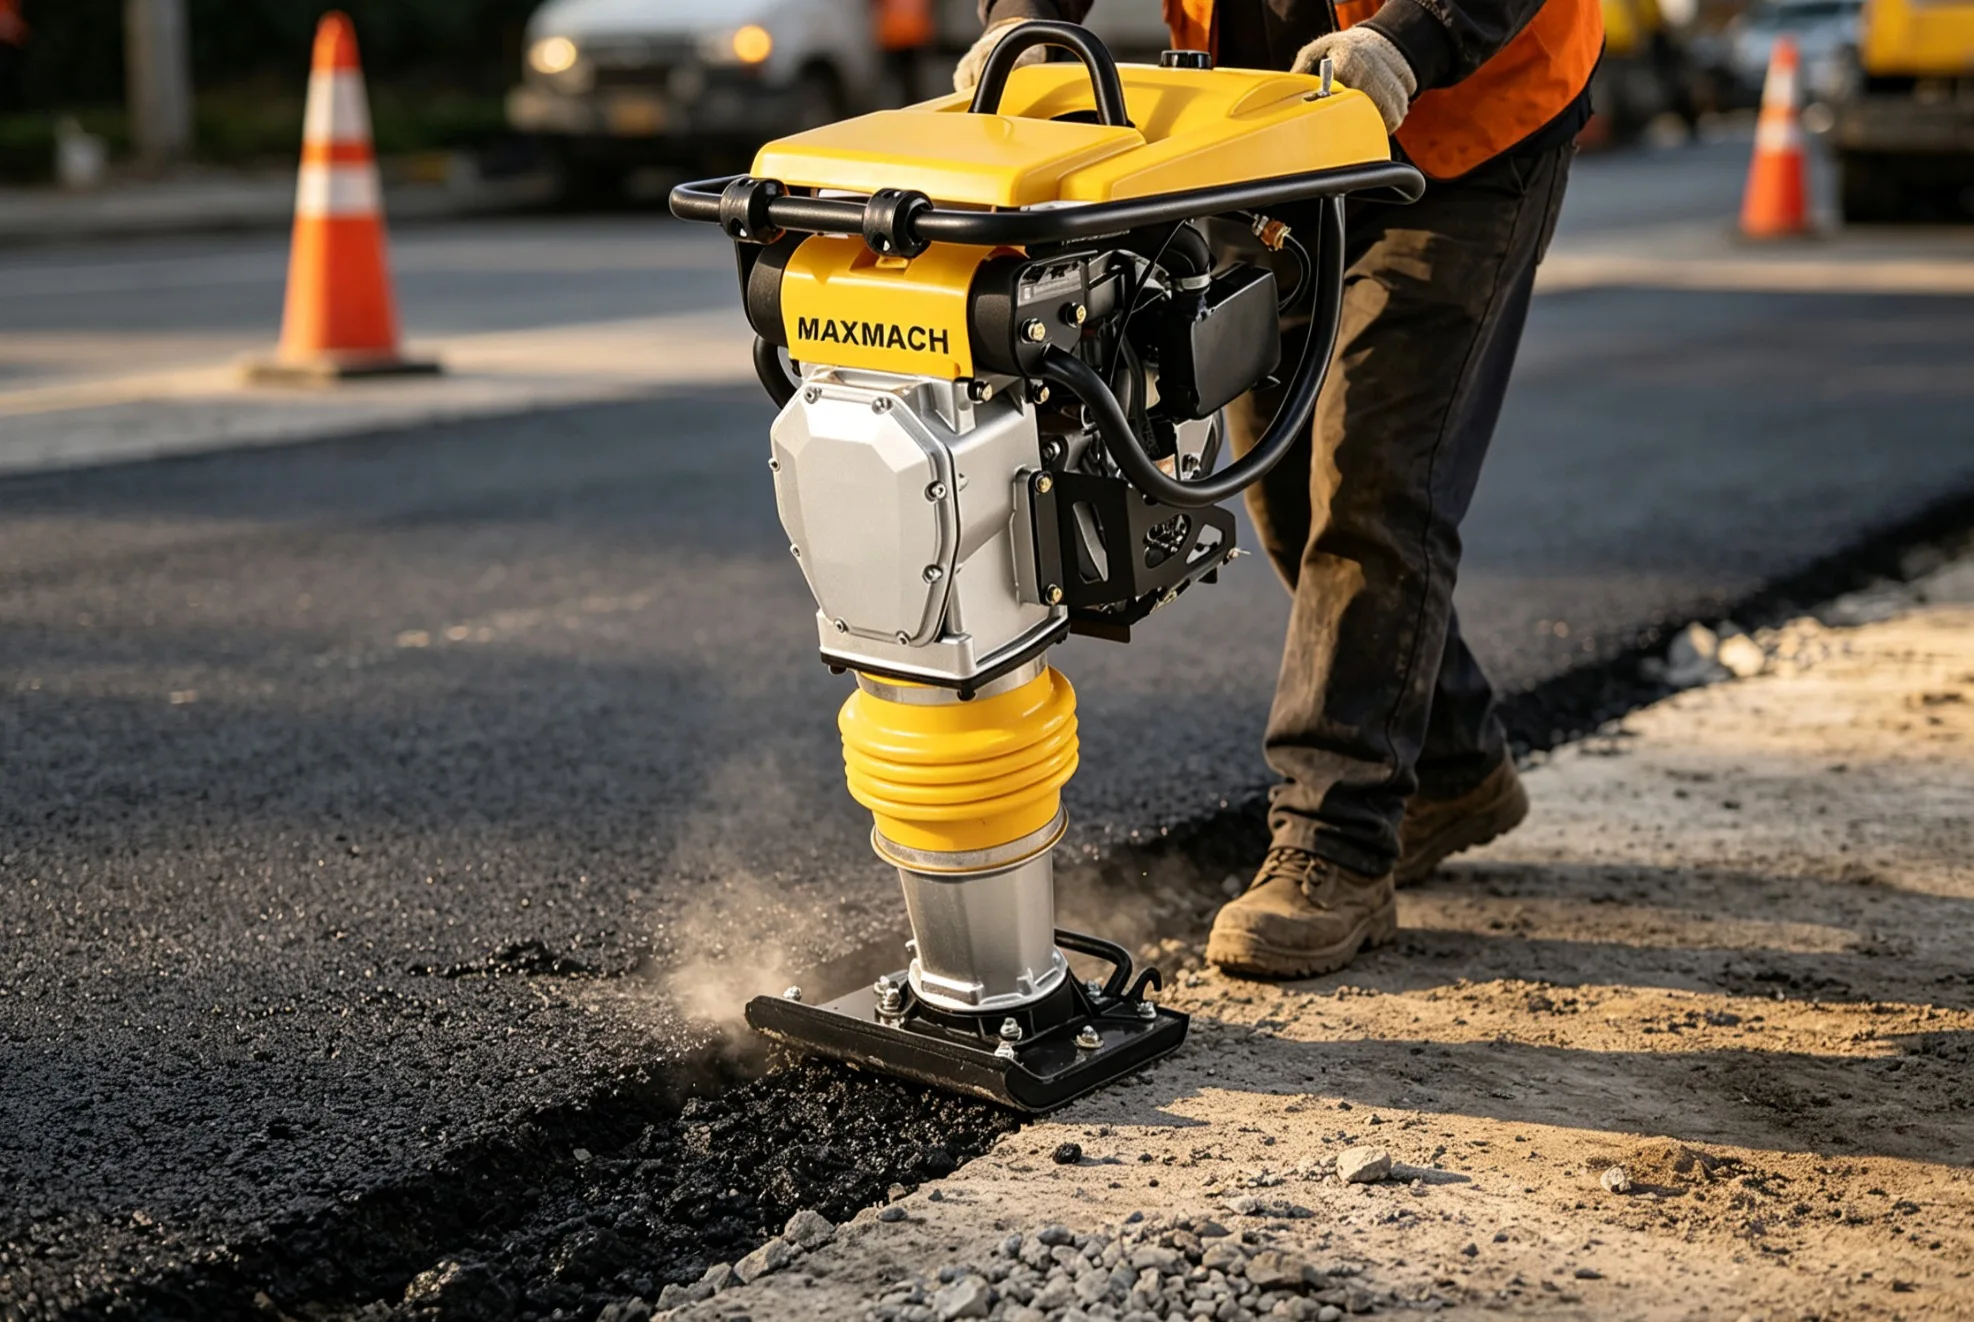
Tamping rammer stops working after long use: what the failure really means
The key point is that “stops working” can mean three different failures: it will not start, it starts but dies under load, or it runs but no longer compacts effectively. These are not the same problem. A machine that cranks but does not fire usually points to ignition or fuel delivery. A machine that starts and then stalls after a few minutes often points to venting, overheating, or fuel starvation. A machine that still runs but has weak jumping or low impact energy usually has clutch wear, spring fatigue, a damaged bellows, or poor engine output.
That distinction matters because tamping rammer troubleshooting becomes much faster when the symptom is classified first. In the field, operators often say the unit is “dead” when the real issue is actually a slipping clutch or a torn air filter element. For small construction crews, this difference can save hours and avoid unnecessary part replacement.
Rammer troubleshooting checklist for fuel, air, and ignition
The first diagnostic layer should always be the simple consumables. Fuel quality, air intake, and ignition wear account for many long-use shutdowns.
| Check point | Typical failure sign | Likely effect | Field action |
|---|---|---|---|
| Fuel filter | Restricted flow, hard restart | Lean running, stalling | Inspect and replace if dirty |
| Air filter | Dust loading, black smoke | Loss of power | Clean or replace element |
| Spark plug | Weak spark, carbon fouling | No start or misfire | Check gap and replace if worn |
| Fuel tank vent | Engine recovers after cap loosening | Vacuum lock | Clean vent path |
The spark plug gap on many small engines is commonly specified around 0.7 mm to 0.8 mm, but the exact value must follow the engine manufacturer’s data. In practice, a plug that is only slightly fouled may still spark in free air while failing under compression. That is why visual inspection is not enough; plug condition, electrode wear, and fuel residue all matter.
Air restriction is especially common after long use on dusty sites. Fine cement dust, soil particles, and fuel vapor residue gradually reduce airflow. Once the engine cannot breathe, combustion temperature rises and power falls. If the rammer restarts after a short rest period, that is a strong clue that heat and airflow, not a hard mechanical seizure, are the issue.
How long-use wear changes tamping rammer performance
Wear does not usually break a tamping rammer all at once; it lowers its impact energy step by step. The operator feels this as slower jumping, weaker compaction, more vibration in the handles, or a machine that bogs down in dense fill. That is why long-use diagnostics should include both engine checks and the lower drive assembly.
| Wear area | What changes first | Operator symptom | Replacement priority |
|---|---|---|---|
| Clutch shoes | Reduced friction capacity | Poor engagement | High |
| Spring assembly | Loss of rebound force | Weak jump stroke | High |
| Bellows | Air leakage or cracking | Loss of impact consistency | High |
| Foot plate | Edge wear | Reduced soil penetration | Medium |
Compaction equipment performance is also tied to the project requirement, not just machine condition. In many road and trench jobs, density targets are verified against the spec rather than by machine feel. For example, ASTM D698 covers the Standard Proctor compaction test, while ASTM D1557 covers the Modified Proctor test; these methods are widely used to define moisture-density relationships and field target density. If a rammer is underperforming, the end result may be failure to reach density even though the unit still runs.
That is why a machine can appear “working” yet still be functionally unusable on site. A rammer that no longer achieves sufficient impact energy increases rework risk, extends cycle time, and can compromise trench or backfill quality.
Engine-side causes that make a tamping rammer stop working
The engine is often blamed first, and sometimes correctly. After long service, several engine-side faults become common.
- Carburetor contamination: varnish, sediment, and stale fuel can block jets and affect mixture quality.
- Restricted exhaust: carbon buildup or a damaged muffler limits breathing and power output.
- Valve wear or poor sealing: compression drops and starting becomes difficult.
- Overheating: dust loading, poor oil condition, or overload can trigger shutdown or power loss.
- Governor issues: unstable engine speed can prevent consistent rammer operation.
Compression is a critical checkpoint because an engine can still turn over while losing the pressure needed for combustion. In field service, a compression tester is often the fastest way to separate fuel problems from mechanical wear. If compression is low, the technician should inspect rings, valves, and cylinder condition before replacing ignition parts.
Operators in the field often think a fresh spark plug will solve everything, but that is only true when ignition is the root cause. If the machine starts briefly and then dies under load, the real issue may be fuel starvation or a worn drive assembly. A systematic approach prevents repeat failures.
Impact system failures: why the rammer runs but does not compact
The most frustrating failure is when the engine runs but the rammer delivers weak or irregular hits. That usually means the drive system, not the engine, is failing.
| Component | Failure mode | What the operator sees | Repair path |
|---|---|---|---|
| Clutch | Slippage | Engine revs but no effective jump | Inspect shoes and drum |
| Bellows | Crack or air leak | Uneven stroke, weak compaction | Replace damaged bellows |
| Spring stack | Fatigue | Reduced rebound force | Replace spring set |
| Foot assembly | Loose fasteners or wear | Poor ground contact | Tighten or renew components |
Because tamping rammer impact energy depends on repeated mechanical transfer, even small wear can reduce effectiveness. On high-cycle jobs, this shows up as slower productivity and more passes needed to reach the same compaction result. ISO 18674-4 is used in geotechnical monitoring contexts to structure how soil behavior is observed and assessed, which reinforces the practical idea that ground response should be checked, not assumed.
If the engine speed sounds normal but the machine does not “bite” into the soil, the clutch or bellows should move to the top of the repair list. This is also the point where many crews choose between repair and replacement, especially if the unit has already logged many heavy-duty cycles.
When to repair and when to replace a tamping rammer
The right decision depends on total wear, downtime cost, and part availability. A repair makes sense when the failure is localized and the engine base is still healthy. Replacement becomes more attractive when multiple wear systems fail at the same time.
- Repair is usually justified when the issue is a spark plug, filter, fuel line, or a single torn bellows.
- Repair may still be justified when clutch wear is present but the engine compression remains stable.
- Replacement becomes more practical when the machine has repeated starting failures, weak compaction, and visible structural fatigue.
- Downtime should be counted because one lost crew day can cost more than the repair itself on a busy site.
For contractors working on road patches, utility trenches, or small foundation fill zones, a reliable backup compaction unit can reduce risk. This is where product planning matters. For example, a crew that uses concrete mixers for material prep and floor grinders for slab finishing may also benefit from keeping a separate rammer in reserve for trench work and edge compaction.
In many operations, the economic decision is not just “can it be repaired?” but “can the job afford to wait?” That is especially true when the rammer supports a critical path activity such as backfill compaction before paving or slab pour.
Preventive maintenance that reduces rammer failure after long use
Preventive maintenance is the cheapest fix because it stops small degradation from becoming a shutdown. The strongest maintenance programs focus on the parts that fail gradually.
- Clean or replace the air filter at short intervals on dusty sites.
- Use fresh fuel and drain stale fuel before storage.
- Inspect the spark plug, ignition lead, and plug cap regularly.
- Check fasteners, bellows condition, and spring alignment after heavy duty cycles.
- Keep the foot assembly clean so soil buildup does not hide wear or looseness.
For site managers, the important idea is repeatability. A machine that runs today but deteriorates next week is already giving a warning. Tracking service intervals, symptoms, and part replacements is more effective than waiting for a full failure. NIST guidance on measurement traceability emphasizes consistent, repeatable measurement practice; the same logic applies to equipment maintenance logs, where consistent observation helps identify drift before breakdown.
In a real trenching or backfill job, this approach saves more than repair cost. It stabilizes compaction quality, reduces crew frustration, and prevents avoidable schedule slips.
Practical field sequence for tamping rammer troubleshooting
The most efficient troubleshooting sequence is simple enough for a small crew to follow on site.
- Confirm fuel level and fuel freshness.
- Inspect the air filter for dust loading.
- Check spark plug condition and ignition output.
- Verify fuel cap venting and line flow.
- Listen for clutch engagement and observe stroke behavior.
- Inspect bellows, springs, and foot assembly for wear or damage.
- Measure compression if the engine still fails to run correctly.
This order works because it removes the easiest causes first and avoids unnecessary teardown. In compaction equipment service, that discipline is often the difference between a one-hour fix and a full day of lost production.
Why long-use failures are common on compact jobsite equipment
Long-use failures are common because tamping rammers work in one of the harshest operating environments: dust, vibration, heat, and intermittent load. That combination accelerates wear on filters, fasteners, clutch elements, and the lower impact system.
Site conditions also matter. A machine used in trench backfill will experience more constrained operation than one used on open, clean soil. Add poor storage, infrequent servicing, and stale fuel, and the failure rate rises quickly. The most dependable crews treat the rammer as a system, not a single engine with a foot plate.
For procurement teams, this is also why product selection should match the work. If the main tasks include trench edges, utility backfill, and restricted access areas, a rammer is the right tool; for broader surface compaction, a plate compactor is often more efficient. Matching the tool to the task reduces overload and extends service life.
Decision guide: what to do when your tamping rammer stops working
The fastest decision path is to classify the failure, inspect the likely wear points, and then decide repair versus replacement.
| Symptom | Most likely cause | First action | Decision |
|---|---|---|---|
| No start | Fuel, ignition, compression | Check fuel and spark | Repair if localized |
| Starts then dies | Vent, fuel starvation, overheating | Inspect airflow and fuel path | Repair if no mechanical damage |
| Runs but weak | Clutch, spring, bellows wear | Inspect drive assembly | Repair if wear is moderate |
| Intermittent operation | Loose connection, contamination | Check fasteners and plugs | Usually repairable |
A well-structured troubleshooting workflow gives technicians confidence and helps project managers plan downtime. That is especially valuable for contractors who must keep multiple machines moving across road repair, paving prep, and small civil works.
If the rammer has already accumulated heavy use and shows several of these symptoms at once, replacement may be more economical than chasing individual faults. If only one subsystem is worn, targeted repair is usually the best route.
FAQ
Why does my tamping rammer start and then stop after a few minutes?
The most common causes are restricted fuel flow, a blocked air filter, a tank vent problem, or overheating. If the unit restarts after cooling down, heat-related airflow or fuel starvation is especially likely.
Why does the engine run but the rammer does not compact?
That usually points to clutch slippage, spring fatigue, bellows damage, or loose components in the impact assembly. The engine may be fine while the lower drive system is failing.
How do I know if the spark plug is the real problem?
If the engine has weak starting, misfires, or inconsistent firing, inspect the plug first. But if the machine starts well and only loses compaction force, the plug is probably not the root cause.
Can stale fuel make a tamping rammer stop working?
Yes. Stale fuel can leave varnish and sediment that block jets and restrict fuel delivery. This is a frequent issue after storage or long idle periods.
What part wears out first in a long-used rammer?
In many cases, the first wear items are filters, spark plugs, clutch elements, and bellows. Dust and vibration accelerate these failures on construction sites.
When should I replace the bellows?
Replace the bellows when there are cracks, air leaks, inconsistent stroke behavior, or visible deterioration. A damaged bellows can significantly reduce compaction performance.
How can I prevent repeat rammer failures?
Use clean fuel, service the air filter regularly, inspect ignition parts, and check the impact assembly after heavy use. A simple maintenance log is often the best prevention tool.